
Your first job
This page walks through the minimal path from “installed” to “merged PR on a real repo.” The dashboard is the primary control surface; the CLI appears only as an optional shortcut at the end.
1. Open the dashboard and finish setup
If you installed the desktop app: launch Coro from Applications or the Start menu. The bundled dashboard opens automatically (typically http://localhost:3000/dashboard/).
If you installed the CLI: run coro start once, then open http://localhost:3000/dashboard/ if a browser tab did not open.
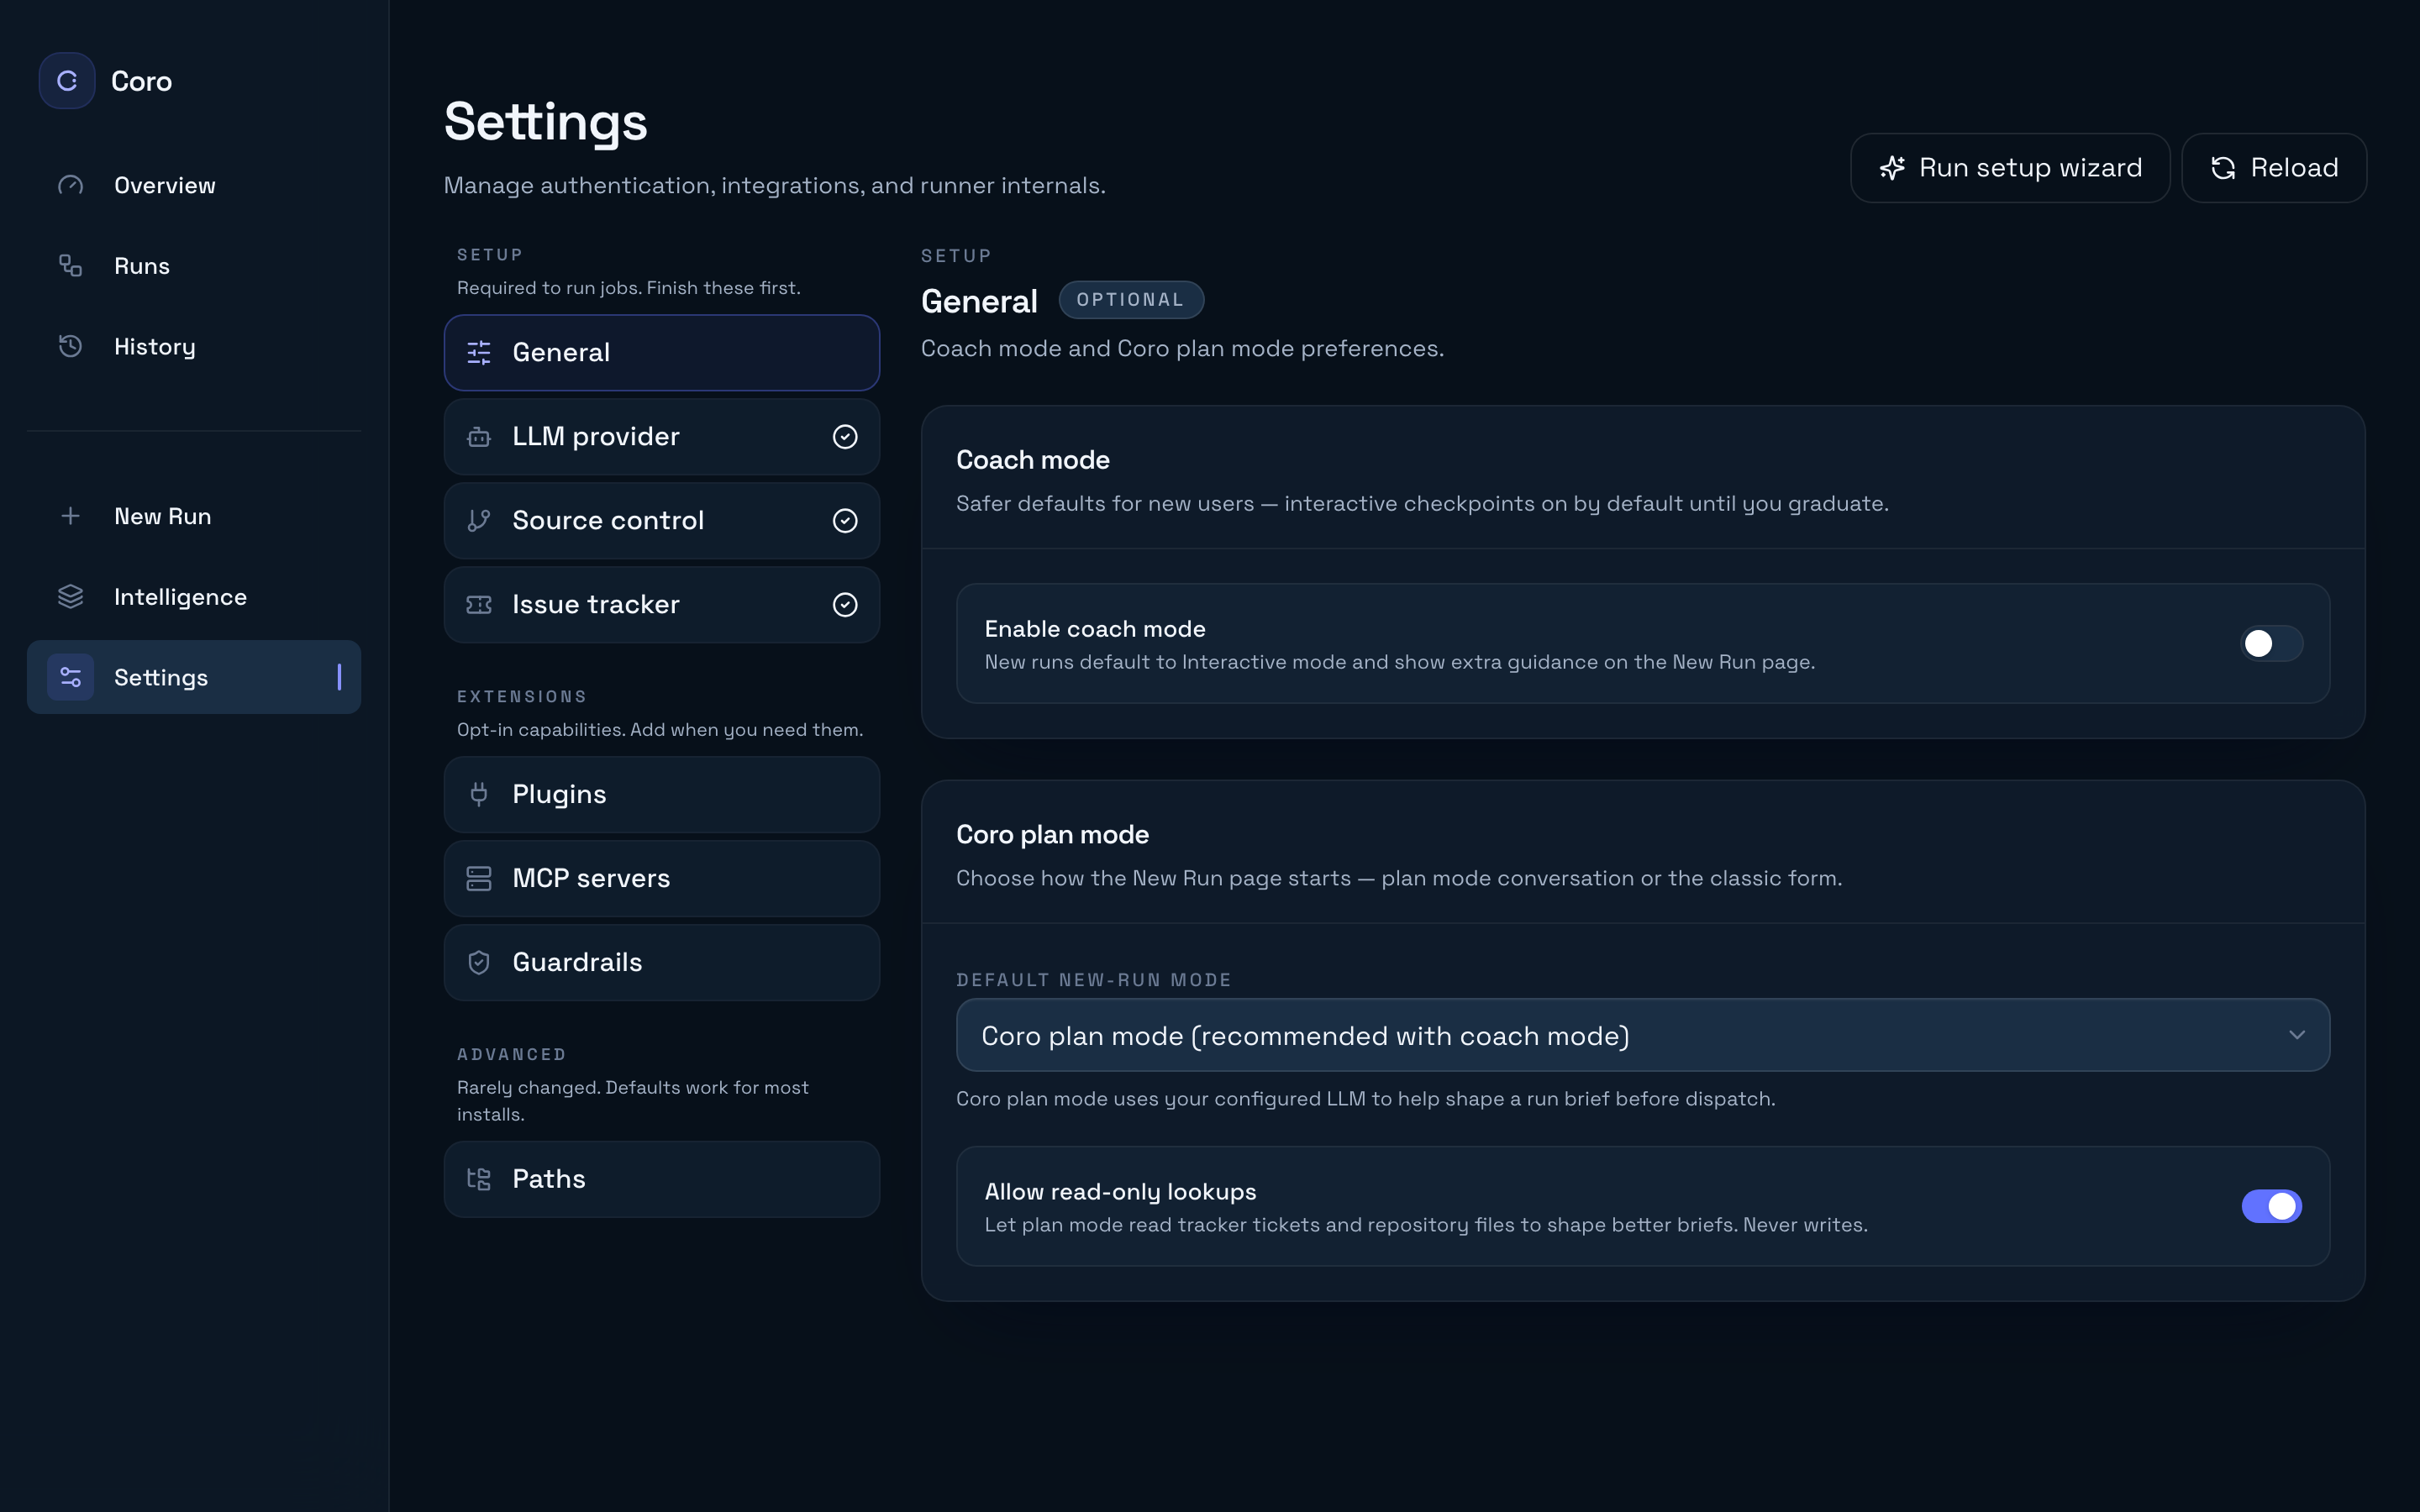
On first launch, complete the setup wizard—it guides you through LLM provider, source control, and an optional issue tracker. Reopen it anytime from Settings → Run setup wizard, or configure each section directly in Settings.
Until at least one SCM plugin is healthy and you have a working LLM path (Claude login and/or API key), new runs block at hand-off points visible in the UI.
See Configure providers for detail on each Settings section.
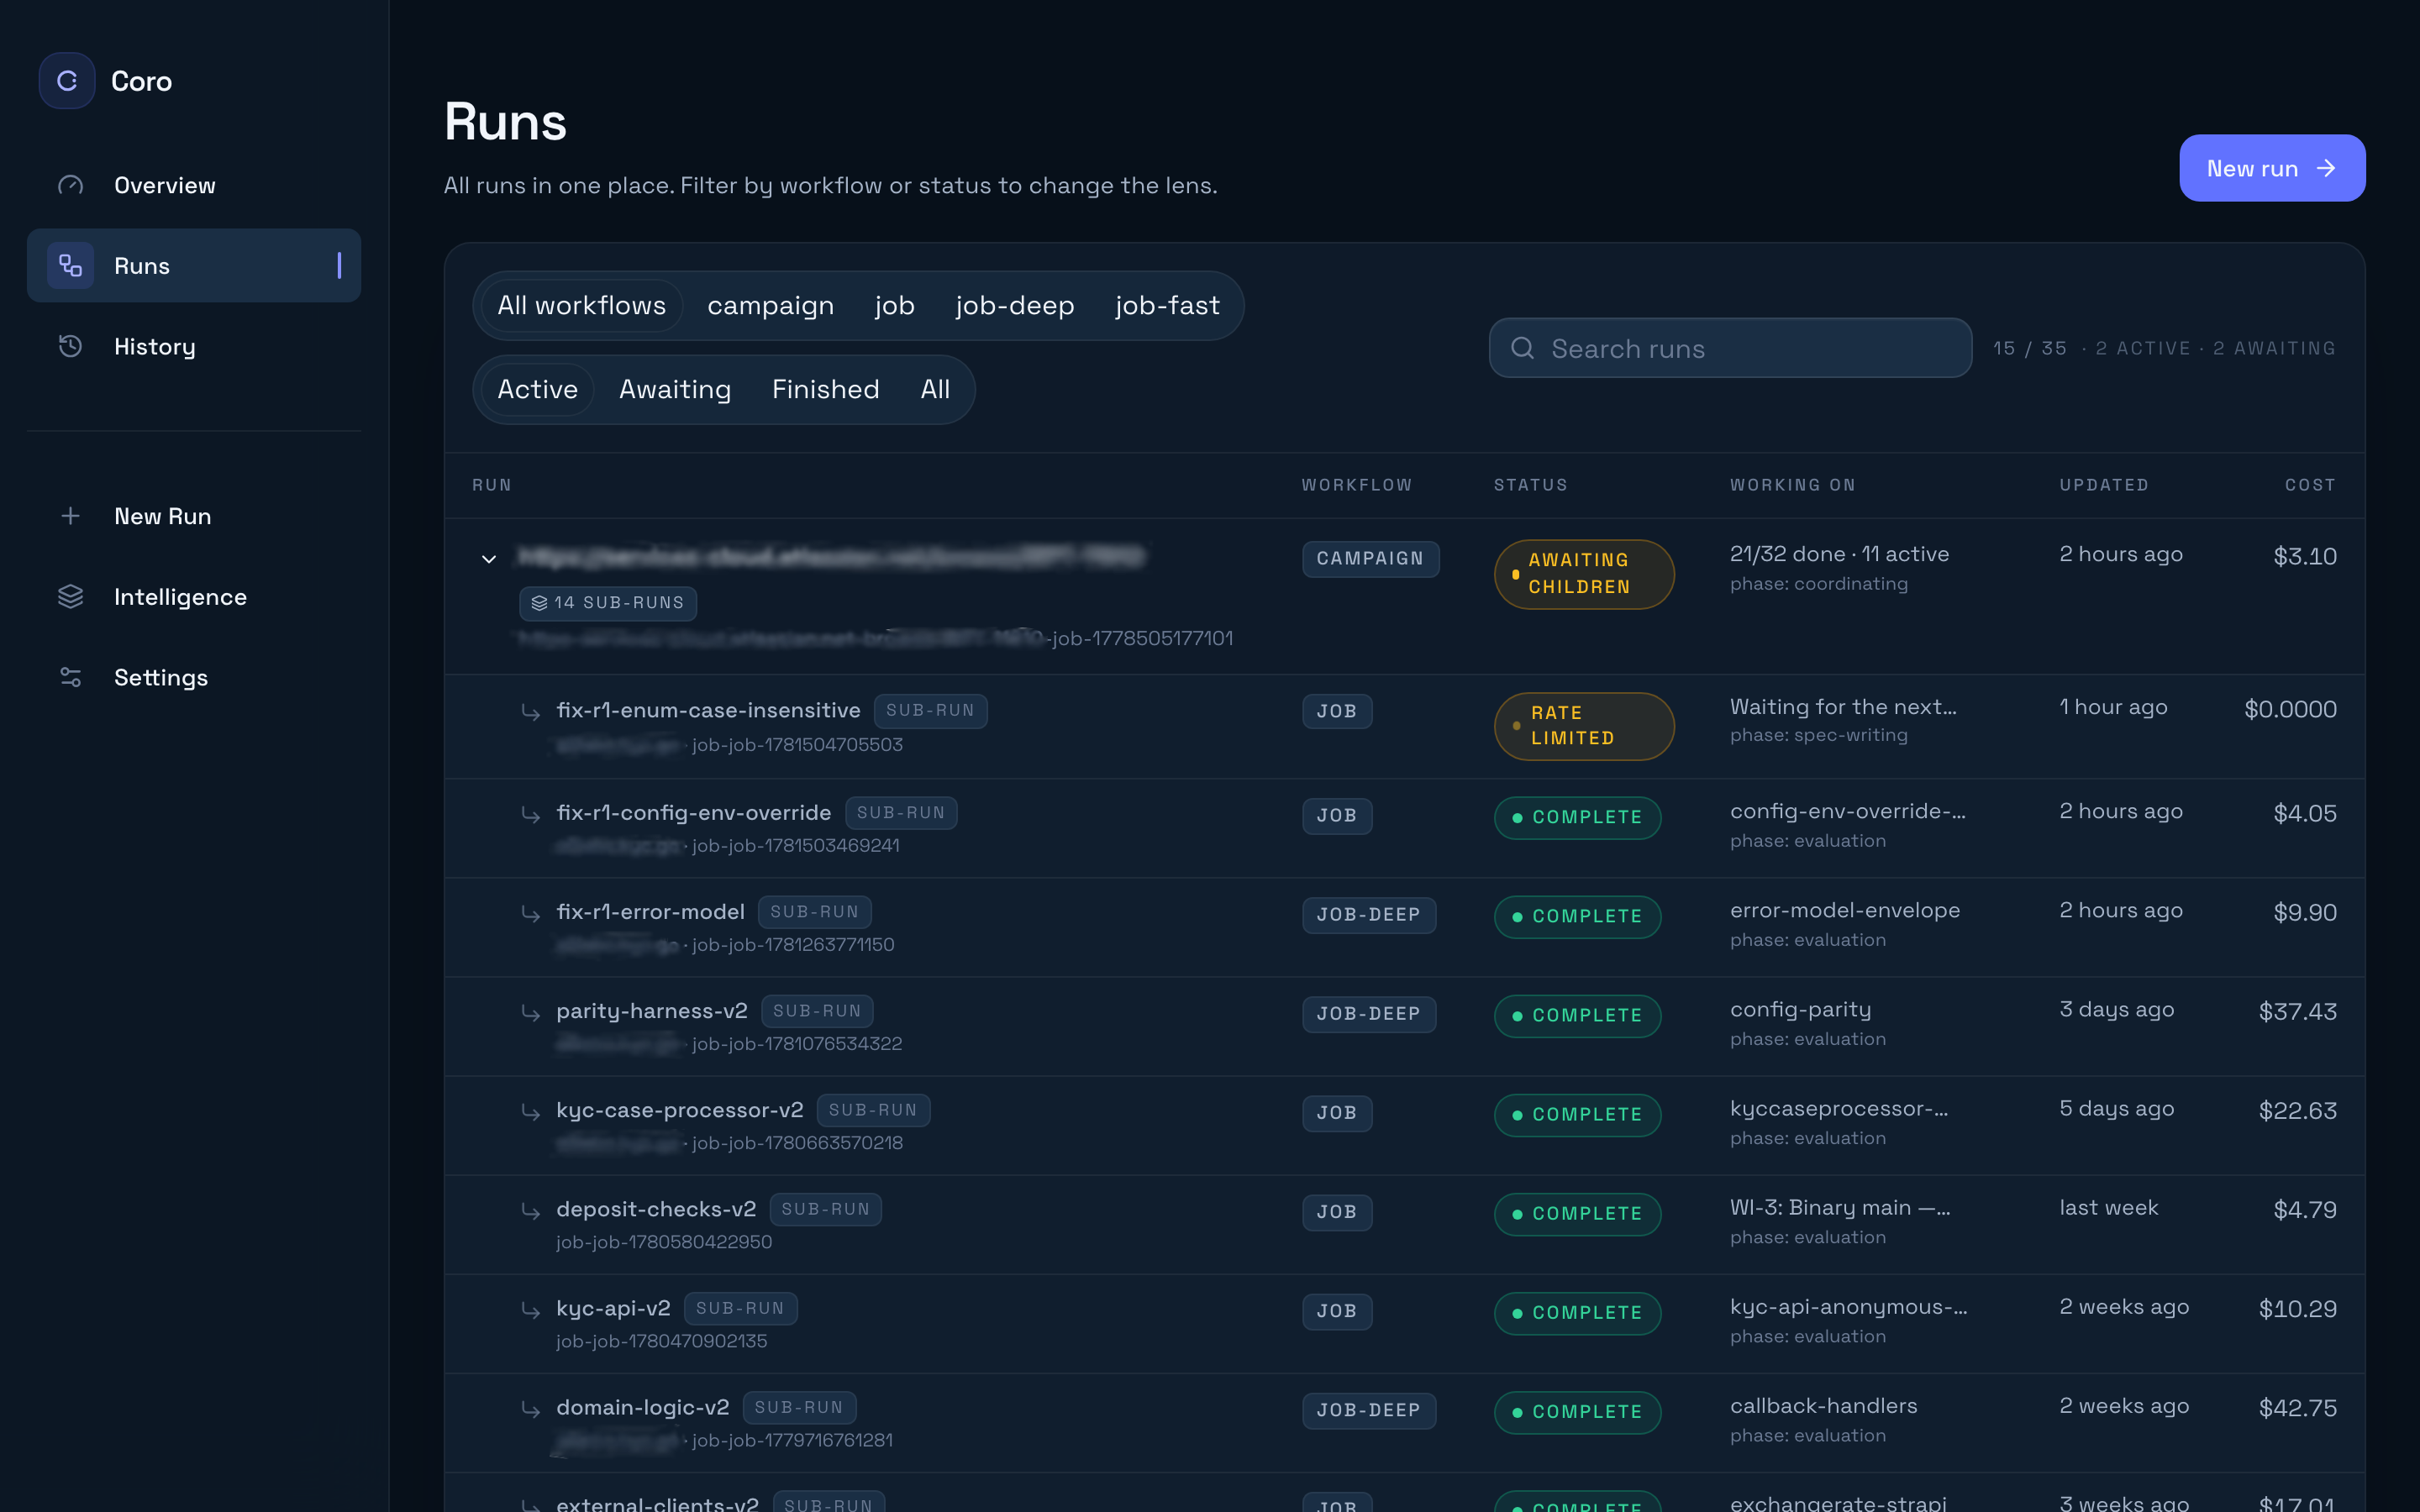
2. Start a run from the dashboard (recommended)
- Open Runs in the sidebar, then click New Run (route:
/dashboard/jobs/new). - Pick how you want to describe the work:
- Coro plan mode — conversational chat that produces an editable brief (default when coach mode is on).
- Classic form — fill in repository, description, and reviewers directly.
- If Settings → General → Default new-run mode is Ask each time, you choose between the two on a landing card first.
Your default intake mode is under Settings → General → Default new-run mode. With coach mode on, plan mode is the default for new installs.
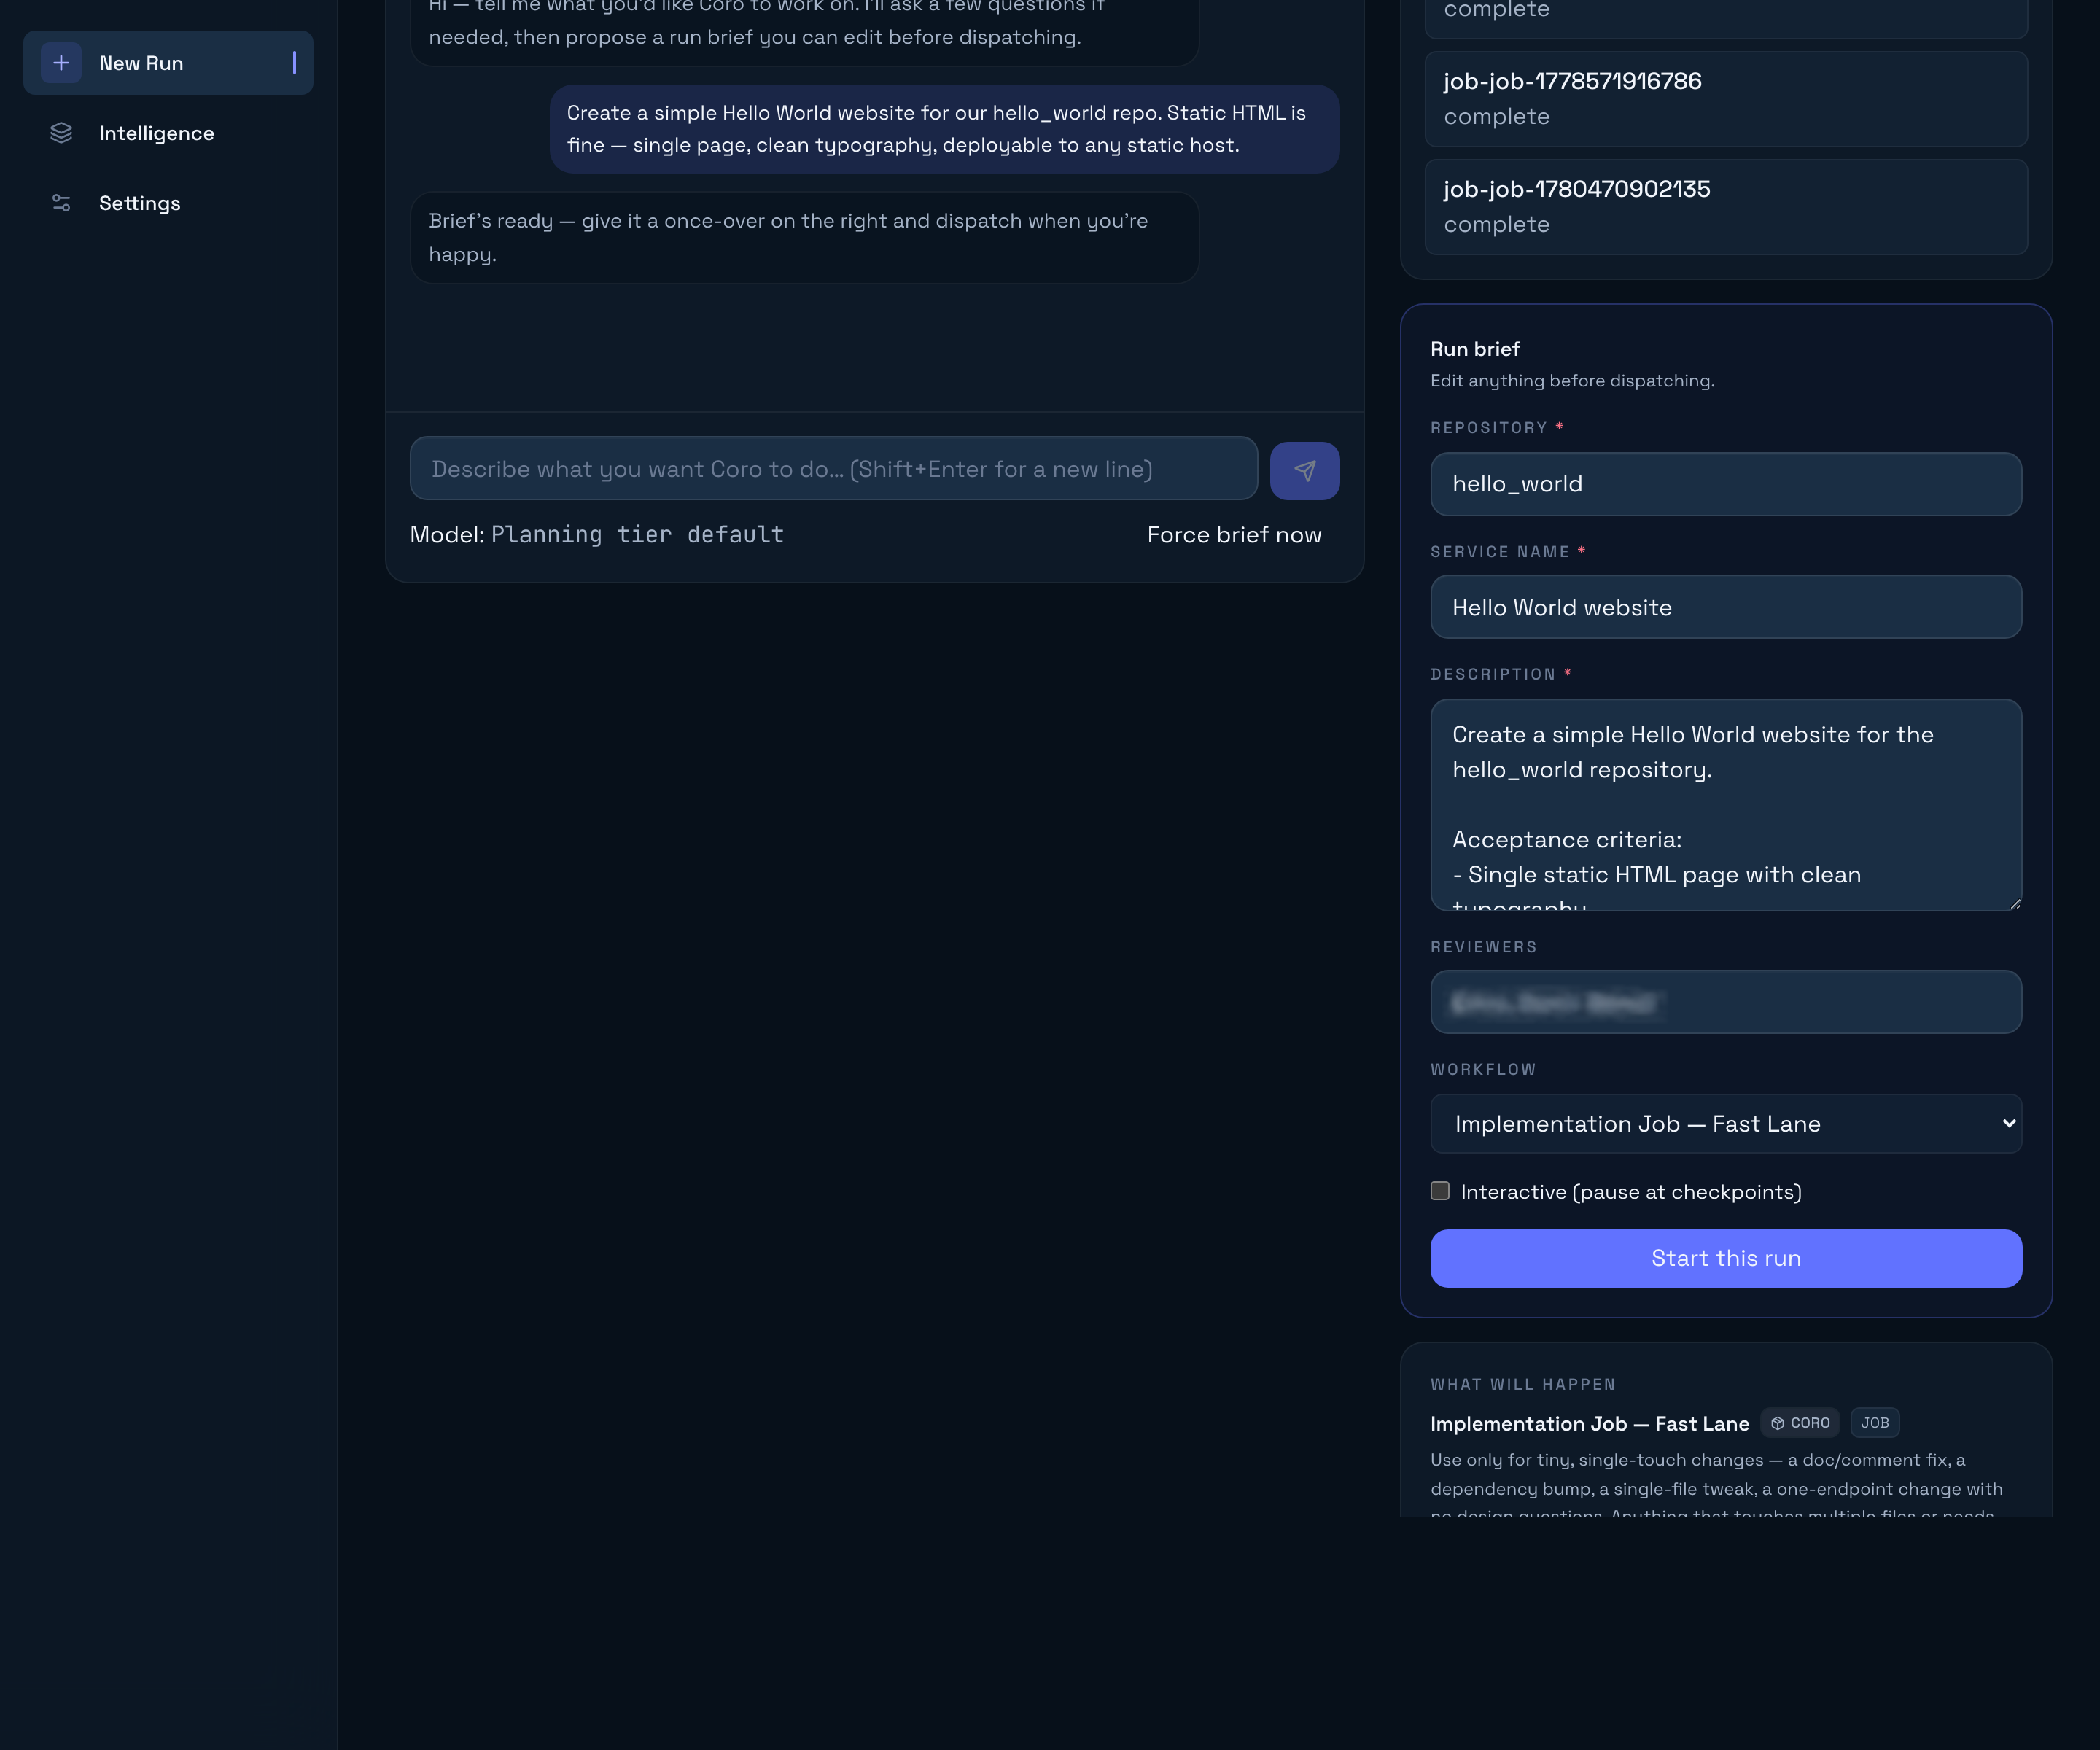
Coro plan mode
The page splits into two columns:
| Left | Right |
|---|---|
| Chat with Coro — describe the task, answer clarifying questions | Placeholder until a brief is ready, then Run brief (editable fields) and What will happen (workflow phase timeline) |
Steps:
- Describe the task in the chat composer (Enter sends, Shift+Enter for a new line).
- When Coro has enough context, it emits a structured brief. The raw payload is hidden in chat; the right column shows an editable Run brief card.
- Review Repository, Service name, Description, Reviewers, and Workflow on the brief card. The What will happen panel below lists the selected workflow’s phases, duration band, and checkpoint behaviour.
- Toggle Interactive (pause at checkpoints) on the brief card if you want approval gates (coach mode turns this on by default until you graduate).
- Click Start this run.
Use Use the form instead in the page header to switch to the classic form without changing your Settings default. Pick a planning model from the Model: label below the chat composer (session-only override).
See Coro plan mode for model picker, read-only lookups, and brief schema.
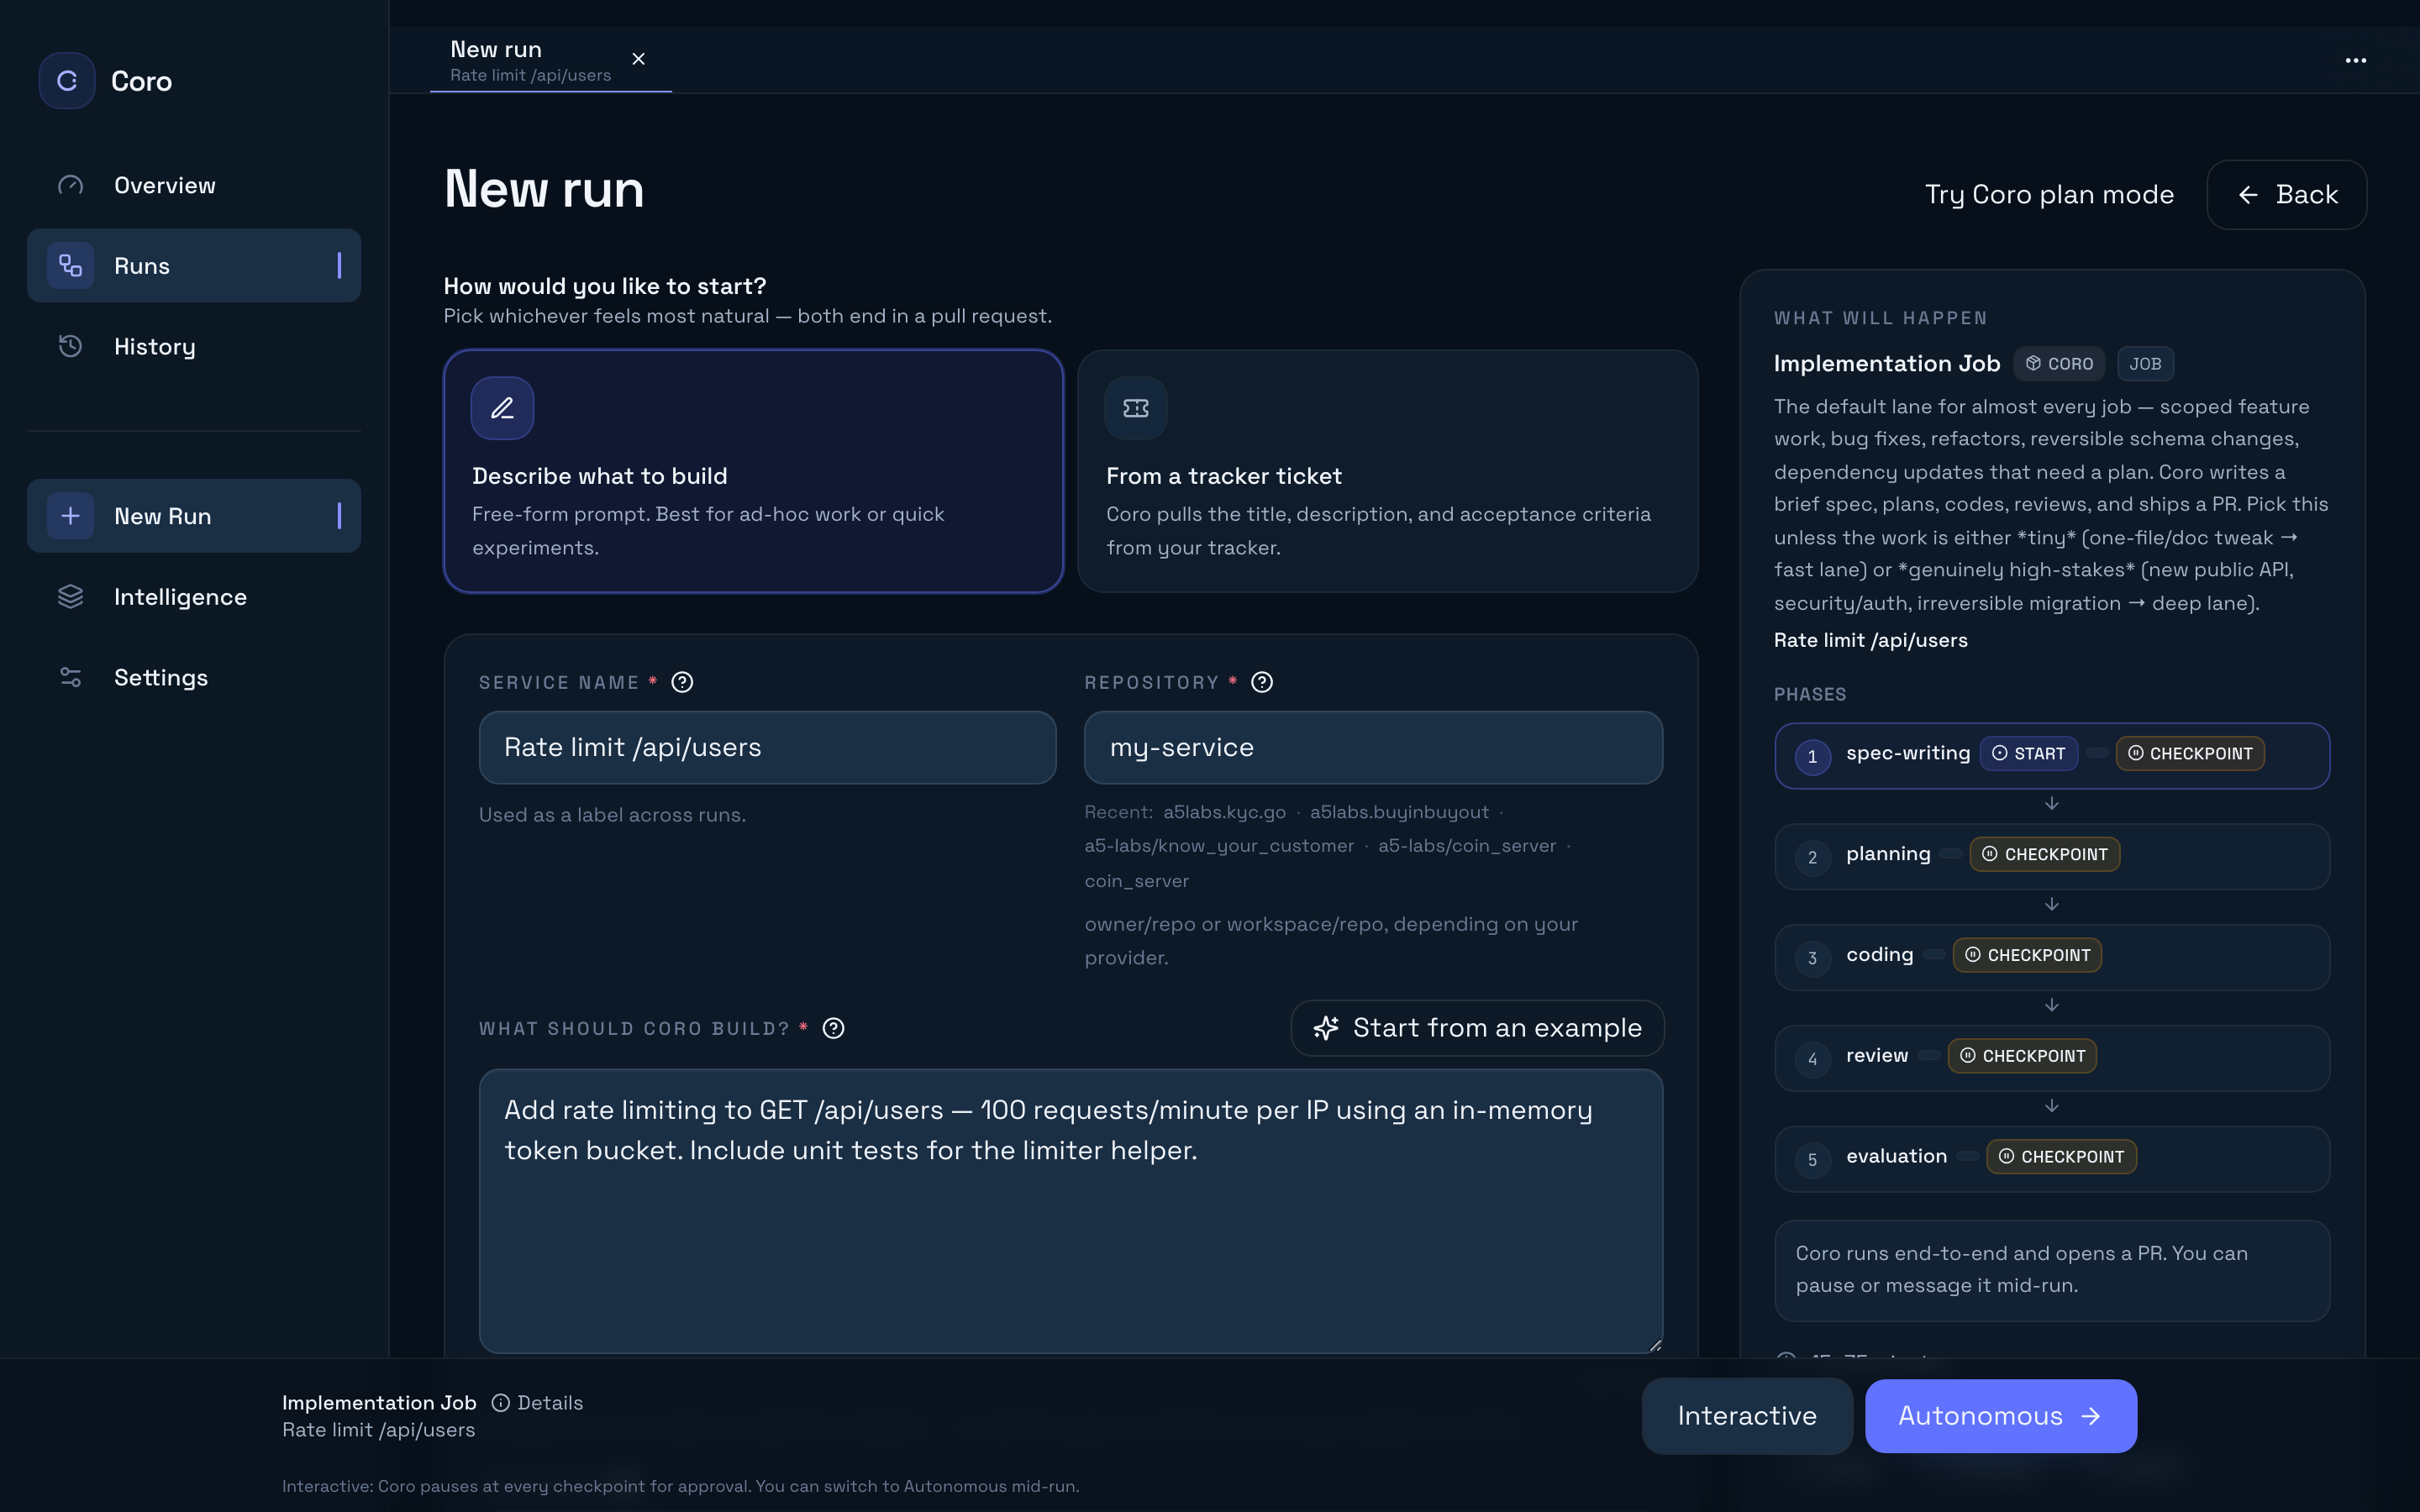
Classic form
The page splits into a form on the left and a sticky What will happen preview on the right:
- Under How would you like to start?, choose Describe what to build (manual) or From a tracker ticket (when a tracker is configured).
- Fill Repository, Service name, Description, and optional Reviewers. Recent values appear as suggestion chips.
- The right-hand What will happen card shows the active workflow’s phase timeline and updates as you type. The default lane is Implementation Job — Standard unless you change it under Advanced → Workflow.
- Use the sticky bar at the bottom of the page to dispatch:
- Interactive — pauses at every workflow checkpoint for approval.
- Autonomous — runs end-to-end and opens a PR (you can still pause mid-run from the run detail page).
When coach mode is active, a banner at the top reminds you that checkpoints are on by default; the bottom bar offers both Interactive and Autonomous prominently.
Try Coro plan mode in the page header switches to conversational intake without changing Settings.
The dashboard creates the same Job object as the CLI—repository slug, description, reviewers, and workflow selection all map to the same runner API.
3. Optional: start from the CLI
For automation or terminal-only environments:
coro job --repo my-service --description "Add rate limiting to /api/users"Replace my-service with a repository slug your SCM plugin can clone (the same identifier you enter in the New Run form). The description becomes the product-facing brief for the agents.
Use coro jobs, coro status --job <id>, and coro logs --job <id> for terminal observability alongside the dashboard. See the CLI reference for every subcommand.
4. What happens next
Coro doesn’t hide the pipeline—each phase is explicit, with logs and work items in the run detail view.
For a typical STANDARD implementation job, the high-level flow is:
- Spec writing — The Spec Writer turns the ticket (or your plan-mode / form / CLI description) into a structured
feature-spec.mdand posts it as aspec-mddashboard artefact. Tracker jobs also read the ticket viatracker_get_issue; other jobs useparams.descriptiondirectly. - Planning — The Planner reads the repo, chooses language conventions, sizes the work (and may switch between FAST, STANDARD, or DEEP lanes), and records work items.
- Coding — The Coder implements the change, runs tests locally, and opens a pull request. A code-reviewer subagent runs inside this phase for convention and plan alignment—this is not the same as the human-facing review step.
- Review — The PR Reviewer phase coordinates human review on your SCM platform, merges when policy allows, and can send the run back to coding for fixes.
- Evaluation — The Evaluator verifies the merged result against acceptance criteria, captures memory and self-improvement proposals when appropriate, and closes the loop.
You’ll see timestamps, tool calls, and phase boundaries in the run detail UI—open any row on the Runs list to inspect phases, logs, artefacts, cost, and PR links.
Learn the dashboard
Once a run exists, inspect phases, logs, artifacts, cost, and PR links alongside any CLI output. Take the dashboard tour →
When you’re ready for deeper framing, continue with Concepts (intelligence layers, workflows, plugins) or jump to Next steps for curated links.